Those of you who have checked our new post series about “Merlin report templates” know by now…
- How to modify existing reports
- How to edit description or report template names
- How to create your own report templates
- How to localize a Merlin report template
- Further tips for localizing an xslt report template
- How to add an option in an xslt report template
- How to add an option in a python / wbl report template
- How to add a property into an existing xslt report
- How to add a property into an existing python /wbl report template
Now let’s do some magic with the reports.
- What if you want to map a status or flag information to a graphic file?
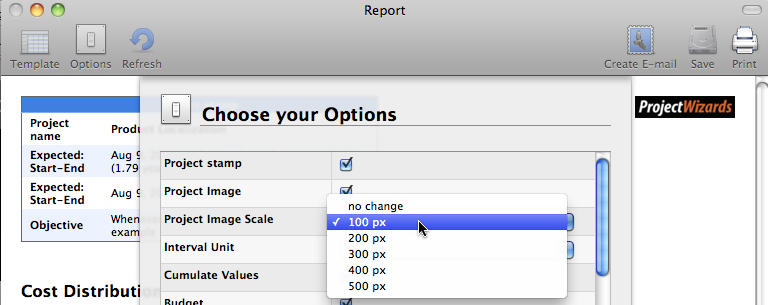
- What if you want to be able to define the size of the project image over the options?
What if you want to be able to define the size of the project image over the options?
In the standard Merlin report templates, you have the option of enabling the “project image”. Should you choose to output the project image, Merlin checks in the “Misc” tab of the project settings whether you have defined such a file and renders it then into the report page in original size.
In case you have a much too large project image which you definitely need on your report, you would have to scale down the original picture  and re-drop it in the project settings dialogue.
To avoid re-scaling, or to be able to do reports for different clients and projects but in a standard way, you may insert an option in the report template and re-size your project images accordingly.
Your workflow
- You define a new dict in the info.plist as…
<dict>
 <key>key</key>
 <string>projectImageScale</string>
 <key>title</key>
 <string>Project Image Scale</string>
 <key>valueClass</key>
 <key>possibleValues</key>
 <array>
   <integer>0</integer>
   <integer>100</integer>
   <integer>200</integer>
   <integer>300</integer>
   <integer>400</integer>
   <integer>500</integer>
  </array>
  <key>possibleValueDescriptions</key>
  <array>
    <string>no change</string>
    <string>100 px</string>
    <string>200 px</string>
    <string>300 px</string><string>400 px</string>
    <string>500 px</string>
  </array>
  <key>restrictToPossibleValues</key>
  <true/>
  <key>allowNullValue</key>
  <false/>
  <key>defaultValueString</key>
  <string>0</string>
</dict>
- You add this method in the report class in the python script
self.projectImageScale      = 0
- You open the wbl file and see the area showing the project image
It is the area with the conditional
<wbl:Conditional condition=withProjectImage>
- You add in the row defining the image a width tag, for example:
<wbl:Image data=project.imageData mimeType=”image/png” key=”logo” Â width=formImageResizer />
- In the python script you define the formImageResizer method:
def formImageResizer(self):
    myWblImageSizeTag = ""
    scale = self.projectImageScale
    if scale > 0:
        scale = int(scale)
        myWblImageSizeTag = str(scale)
    return myWblImageSizeTag
- Save the wbl, python and info.plist files
- Open your project and call your report
- Check the options and select a desired project image size

- See your project image changing its size accordingly
